Make greeting cards and invitations using Publisher
Note: If you use a template that you downloaded from Office Online, you cannot customize the design until you open the publication.
If you don't see a design that you like, you can search for additional card and invitation templates on Microsoft Create.
Personalize your card
- Make global design changes
- Work with the pictures
- Work with the text
Make global design changes
You might want to make changes that affect the entire publication. For example, you might want to try other color or font schemes. You can make such changes at any time, but it is best to do it before you insert the text and pictures.
Do either of the following:
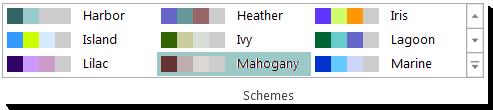
To try a different color scheme, on the Page Design tab, click the color scheme that you want. If you hover over the color schemes you’ll immediately see how your greeting card will look if you choose the color scheme.

To try a different font scheme, on the Page Design tab, click Fonts, and then choose the font scheme that you want.
Work with the pictures
For more information about working with pictures, see Tips for working with images.
Replace the placeholder pictures with your own pictures
- Right-click the placeholder picture, click Change Picture >Change Picture.
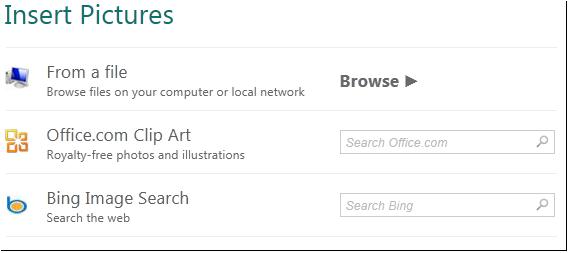
- In the Insert Picture dialog, either browse to find pictures on your own computer or on your local network, or search for pictures on Office.com or from Bing.
Note: Inserting pictures from Office.com and Bing is not available in Publisher 2010. Pictures you find online must be downloaded to your computer before you can insert them.
Add a new picture
- On the Insert tab, click a picture option in the Illustrations group (such as Pictures or Online Pictures) .
- Browse for pictures on your computer, or search Office.com or Bing for images, and click Insert.
Note: Inserting pictures from Office.com and Bing is not available in Publisher 2010. Pictures you find online must be downloaded to your computer before you can insert them.
Work with the text
To replace the placeholder text with your own message, simply select the placeholder text, and then type your own message.
Add new text
- On the Insert tab, click Draw Text Box.
- In your card, point to where you want one corner of the text to appear, and then click and drag diagonally until you have a box that is the size that you want. Click inside the box to type and format your text.
Replace the placeholder text with a verse
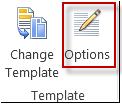
In the Page Design tab, click Options.
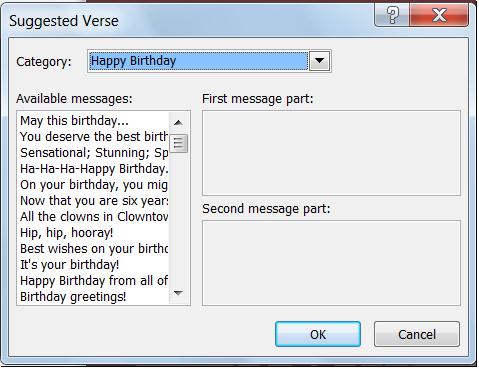
For Category, click the message category that you want. Under Available messages, click the message that you want, preview the two parts of the message on the right, and then click OK.
Print and finish the card
In Publisher, cards are set up to be printed on specific sizes of paper. For example, if you select a design that is sized for letter-size paper, you need to make two folds in the paper after you print the card.
1 When you preview the card before you print it, it looks like step 1.
2 When you print the card on a color printer, before it is folded, it looks like step 2.
3 In step 3, you fold the card in half from top to bottom.
4 In step 4, you fold the card from side to side.
Print the card
- When the card looks the way that you want, save the file.
- Click File >Print, and then under Settings, verify that the appropriate format is selected, such as Side-fold, quarter sheet, Side-fold, half sheet, or Booklet, side-fold.
Note: These options are available only when the publication page size is smaller than the paper that the publication is set to be printed on.
Pick a template
- Start Publisher, and then click Invitation Cards or Invitation Cards in the Publication Types list.
- Scroll through the predesigned card publications and choose a template, which are organized into groups by theme. If you don't see a design that you like, you can search for additional greeting card templates on Microsoft Office Online by using the Search for templates box above the list of available templates.
Important: You must be connected to the Internet before you can search Office Online for Publisher templates.
- Under Customize, click the color scheme and font scheme that you want.
- Under Customize, click the business information set that you want, or create a new one.
- Under Options, select the page size that you want, such as Half-page side fold or Quarter-page top fold.
- Under Options, select the layout that you want.
- If you use a template that you downloaded from Office Online, you cannot customize the design until you open the publication.
- Some of the side-fold cards are set up for only one layout option. If you choose one of these designs, alternate page size and layout options are not available.
Personalize your card
- Make global design changes
- Work with the pictures
- Work with the text
Make global design changes
You might want to make changes that affect the entire publication. For example, you might want to try other color or font schemes. You can make such changes at any time, but it is best to do it before you insert the text and pictures.
Do any of the following:
- To try a different color scheme, click Color Schemes in the Format Publication task pane, and then click the color scheme that you want.
- To try a different font scheme, click Font Schemes in the Format Publication task pane, and then click the font scheme that you want.
- To change the page size, click the Options section in the Format Publication task pane, click Change Page Size, and then select a new page size in the Page Setup dialog box. Most of the predesigned cards are formatted to be printed on letter-size paper that you fold into quarter pages. You might want to print on both sides of half-letter-size paper. How do I change the page size to half-letter size?
- In the Page Setup dialog box, click Advanced.
- In the Custom Page Size dialog box, type the name of your custom page size. For example, type Half-letter size.
- Under Options, select Half-page side fold in the Sheet fold list.
- Under Page, change the width to 4.25" and the height to 5.5".
- Under Preview, verify that your page and sheet sizes are formatted the way that you want them, and then click OK. For more information, see Change page size, paper size, or orientation.
- To insert business information, click Business Information on the Insert menu, and then drag the item that you want from the Business Information task pane onto your publication page. To change the business information, click Change Business Information in the Business Information task pane. For more information, see Create, change, or remove business information data.
Work with the pictures
For more information about working with pictures, see Tips for working with images.
Replace the placeholder pictures with your own pictures
- Right-click the placeholder picture, click Change Picture on the shortcut menu, and then choose the source of the new picture.
Tip: If you don't see Change Picture when you right-click, click the placeholder picture once until you see white circles surrounding the picture's frame. Click the picture again until you see gray circles with x's in them surrounding the picture itself, and then right-click the picture.
Add a new picture
- On the Insert menu, point to Picture, and then choose the source of the new picture.
- Click Insert.
- Do any of the following:
- To reposition the picture, drag it.
- To resize the picture, position the mouse pointer over one of the corner handles, and then drag.
- To change the picture colors, right-click the picture, click Format Picture on the shortcut menu, click the Picture tab, and then click Recolor. If you already created a business information set that includes a logo, you can quickly add your logo to the greeting card. On the Insert menu, click Business Information, and then double-click Logo in the Business Information task pane.
Work with the text
For more information about working with text, see Add text in Publisher.
Replace the placeholder text with your own message
If you already created a business information set, your business contact information and logo automatically replace some of the placeholder text.
Note: Business information does not automatically replace the placeholder text in templates that you download from Office Online. To replace placeholder names, addresses, and logos with your business information, click the smart tag button
for a business information item, such as the company name or address, and then click Update from Business Information Set. (The smart tag button appears when you click text or a logo.)
- Select the placeholder text, and then type.
- Adjust the text size. Do one of the following:
- To prevent the text from resizing automatically to fit in a text box that is not connected to other text boxes, click the text box, point to AutoFit Text on the Format menu, and then click Do Not AutoFit.
- To change the font size manually, select the text, and then select a new font size in the Font Size list on the Formatting toolbar. For more information about fitting text in text boxes, see Turn on and off automatic copyfitting.
Add new text
- On the Insert menu, click Text Box.
- In your card, point to where you want one corner of the text to appear, and then drag diagonally until you have a box that is the size that you want.
- Click inside the box and type your text.
Replace the placeholder text with a verse
- In the Invitation Options task pane, under Suggested Verse, click Select a suggested verse.
- Under Category, click the message category that you want.
- Under Available messages, click the message that you want, and then preview the two parts of the message.
Note: If you use a template that you downloaded from Office Online or if you change the page size or format (for example, from side-fold to top-fold), suggested verses are not available.
Print and finish the card
In Publisher, cards are set up to be printed on specific sizes of paper. For example, if you select a design that is sized for letter-size paper, you need to make two folds in the paper after you print the card.
1 When you preview the card before you print it, it looks like step 1.
2 When you print the card on a color printer, before it is folded, it looks like step 2.
3 In step 3, you fold the card in half from top to bottom.
4 In step 4, you fold the card from side to side.
Print the card
- When the card looks the way that you want, save the file.
- On the File menu, click Print, and then click the Publication and Paper Settings tab.
- Under Printing options, verify that the appropriate format is selected, such as Side-fold, quarter page, Side-fold, half-page, or Booklet, side-fold.
Note: These options are available only when the publication page size is smaller than the sheet that the publication is set to be printed on.
Tip: Purchase card stock that is designed for greeting cards from specific manufacturers. These packages usually include envelopes. Print one or two test cards on plain paper to verify that your publication prints as you expect before you print on the manufacturer's product or more expensive card stock.
